
AI-generated images often fail to look the way we expect.
Beginners commonly face issues such as:
- Faces that look flat, as if lit by a phone screen
- Harsh, ugly shadows under the nose, chin, or eyes
- Overexposed highlights or muddy, underexposed scenes
- Inconsistent lighting direction between subject and background
- Images that feel “AI-ish” instead of like real studio or cinematic photography
Most of these problems are caused not by the AI model itself, but by a missing understanding of a fundamental photography concept:
lighting setup.
Understanding how to describe lighting allows you to create more realistic, dimensional, and mood-driven prompts—regardless of the model you use.
1. Introduction to Lighting Setup
In simple terms, lighting setup is about:
- Where the light comes from (direction)
- How strong it is (intensity / contrast)
- How soft or hard it looks (shadow quality)
- How many lights you use (single light vs multi-light setups)
Photographers often think in terms of key light, fill light, and rim light:
-
Key Light
- The main light source
- Defines the overall shape of the subject
- Example: a window to the left, or a softbox in front
-
Fill Light
- Softer, weaker light that lifts shadows
- Makes the image less contrasty and more flattering
-
Rim / Back Light
- Light behind or to the side of the subject
- Creates a bright edge around the subject, separating them from the background
Light can be:
- Soft (big source, diffused) → gentle shadows, flattering, smooth skin
- Hard (small source, undiffused) → sharp shadows, strong drama and texture
For AI image generation, the model does not have real lamps, but it understands lighting patterns like:
- “soft window light”, “cinematic side lighting”, “three-point studio lighting”
- “strong backlight”, “hard top light”, “dramatic chiaroscuro shadows”
By controlling lighting in your prompts, you shape:
- The mood (cozy, dramatic, clinical, glamorous)
- The believability (consistent light direction and intensity)
- The focus (what is emphasized by brightness and contrast)
2. Applying Lighting Setup in Prompt Writing
Here we transform lighting theory into practical, reusable prompt structures.
2-1. When to Use It
You should explicitly mention lighting in your prompts when:
- You care about mood (romantic vs horror vs corporate)
- You want faces or products to look flattering and professional
- You want a cinematic look instead of a flat “AI render”
- You need consistency across a series of images (e.g., same lighting for a character lineup)
Typical use cases:
-
Portraits & Beauty Shots
- Soft, flattering light, clean shadows
- Keywords: “soft diffused key light”, “beauty dish lighting”, “softbox from 45 degrees”, “fill light to soften shadows”
-
Dramatic Cinematic Scenes
- Strong contrast, directional light, deep shadows
- Keywords: “high-contrast cinematic lighting”, “side lighting”, “rim light from behind”, “chiaroscuro light and shadow”
-
Product Photography
- Controlled reflections, clear shapes
- Keywords: “studio lighting setup”, “three-point lighting”, “soft gradient light on the product”, “backlight highlighting edges”
-
Natural Lifestyle / Documentary
- Realistic, location-based light
- Keywords: “window light from the side”, “golden-hour backlight”, “overcast soft daylight”, “neon light from signage”
-
Stylized / Colorful Lighting
- Gels, colored light, cyberpunk, stage lighting
- Keywords: “dual-tone lighting, teal and orange”, “neon magenta and cyan rim lights”, “stage spotlight from above”
Anytime the “feeling” of your image matters, lighting setup is one of the strongest levers you have.
2-2. Common Problems It Solves
Let’s connect lighting setup to repeated frustrations in AI images.
-
“The face looks flat and lifeless.”
- Cause: front-facing, low-contrast, generic lighting.
- Fix: add directional soft light:
- “soft key light from 45 degrees to the left, gentle shadows on the opposite cheek”
- “window light from the side, subtle contrast, natural falloff”
-
“It looks like the light direction doesn’t match the background.”
- Cause: AI guessed different lighting for subject and environment.
- Fix: define light direction and type clearly:
- “warm golden-hour backlight from the right, long soft shadows”
- “overhead soft light, minimal directional shadow”
-
“Shadows are harsh and unflattering.”
- Cause: hard small light, positioned badly (e.g., straight from below or above).
- Fix: specify softer and more flattering setups:
- “large softbox, soft diffused light, minimal harsh shadows”
- “soft daylight from a big window, diffused”
-
“The image doesn’t feel cinematic, just like a normal snapshot.”
- Cause: evenly lit scene, no shaping or contrast.
- Fix: use cinematic language:
- “single strong side key light, dark background, dramatic cinematic contrast”
- “rim light outlining the character, subtle fill on the face”
-
“Product reflections look messy and distracting.”
- Cause: uncontrolled multi-directional light.
- Fix: use studio lighting terms:
- “clean studio lighting, soft reflections, gradient light across the surface, no harsh hotspots”
2-3. Prompt Examples
You can copy and customize these prompts.
“Cinematic portrait of a woman in a dark room, single soft key light from the left at 45 degrees, gentle falloff into shadow, subtle rim light separating her from the background, high-contrast photography.”
“High-end product photo of a wristwatch, studio three-point lighting, soft key light from above, subtle fill to open shadows, crisp rim light on the edges, clean gradient reflections, black background.”
“Casual lifestyle photo of a man reading by a window, soft natural window light from the right, warm afternoon tone, soft shadows, realistic ambient light in the room.”
“Cyberpunk city portrait, neon magenta light from the left, cyan rim light from behind, soft shadows on the face, reflective surfaces catching color, cinematic lighting.”
“Corporate headshot, even soft lighting, large diffused key light in front, subtle fill to reduce shadows, neutral background, professional studio portrait.”
Try generating similar scenes while only changing lighting keywords to feel how dramatically the mood and realism shift.
2-4. Detailed Use Cases
Below are some concrete lighting scenarios and what is happening in each.
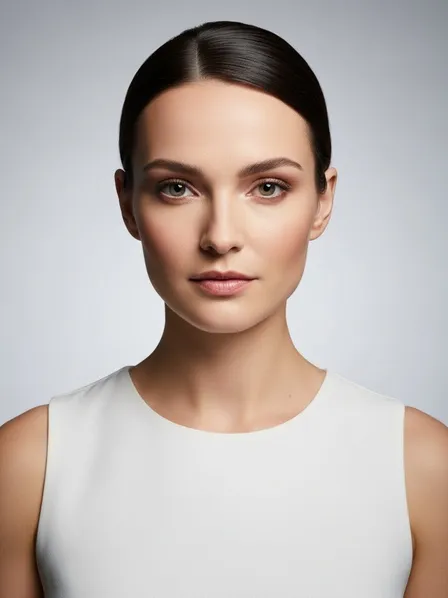
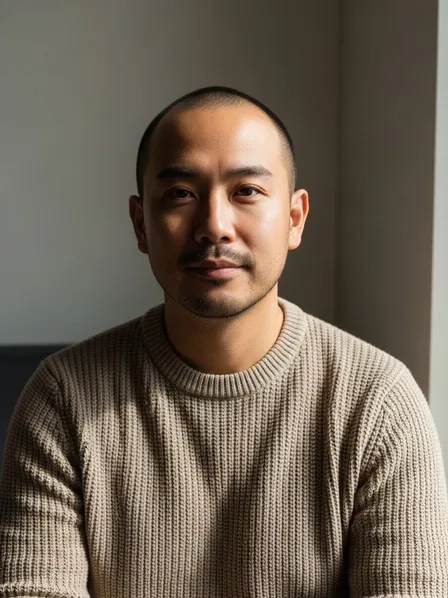
Use Case 1: Soft Beauty Lighting vs Harsh Overhead Light
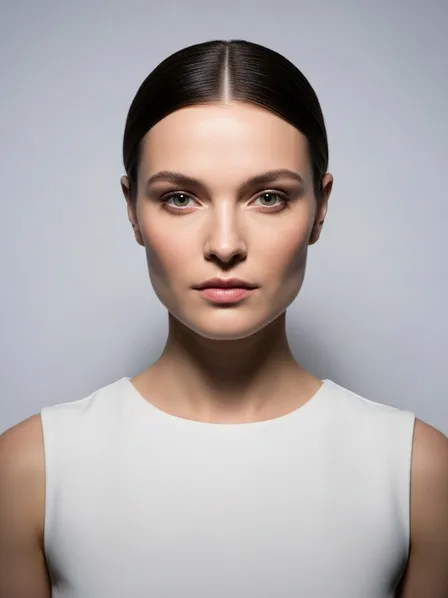
What changed and why:
Soft, angled lighting wraps around the face and reduces imperfections. Overhead hard light carves deep shadows and emphasizes texture. Your prompt should say “soft diffused key light” when you want flattering beauty images.
Use Case 2: Natural Window Light vs Flat Indoor Light
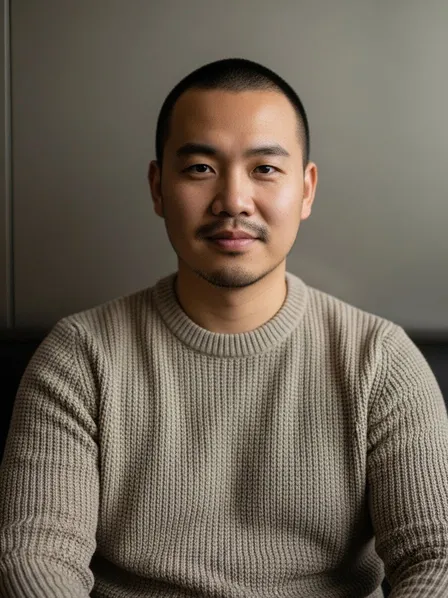
What changed and why:
Window light creates a natural key light and an organic gradient from bright to dark. Flat light makes the image look like a phone flash or poorly lit room. Prompts like “soft window light from the side” immediately improve realism.
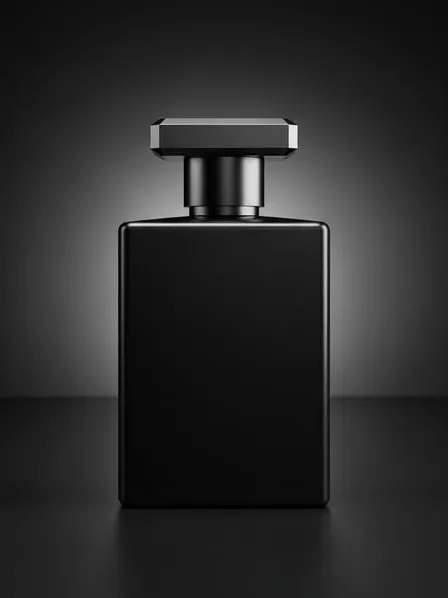
Use Case 3: Three-Point Studio Lighting for Products
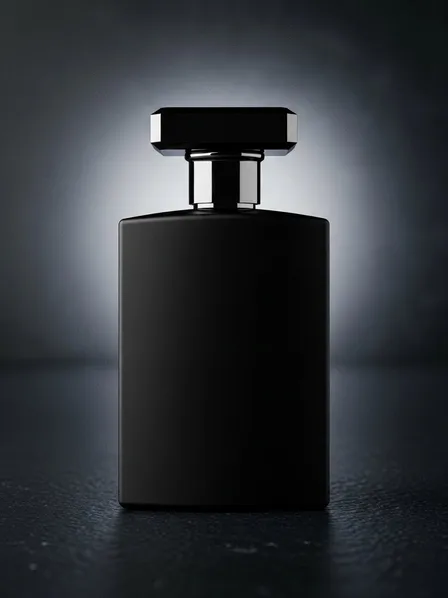
What changed and why:
The three-point style (key, fill, rim) gives the product shape, clarity, and polish. Describing “studio three-point lighting” and “subtle rim light on the edges” tells the AI to light the product like a real commercial shoot.
Use Case 4: Cinematic Character Lighting
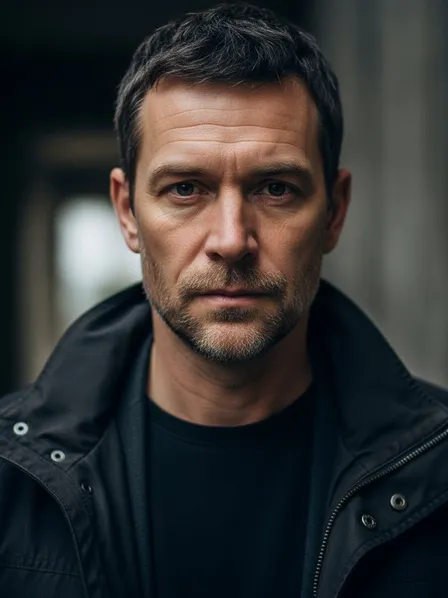
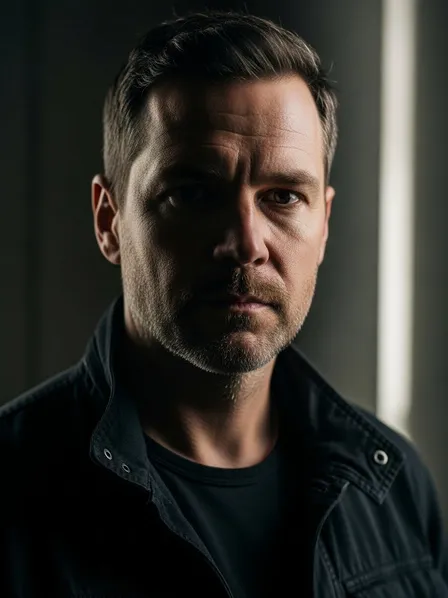
What changed and why:
The cinematic version uses contrast to emphasize emotion and volume. Keywords like “cinematic side lighting,” “dramatic contrast,” and “rim light from behind” mimic real film lighting setups.
3. What You Can Do Now (Practical Benefits)
Once you start thinking in terms of lighting setup, you can:
- Control mood: gentle and soft vs high-contrast and dramatic.
- Make faces and products look more flattering and professional.
- Reduce the “AI” feel by using real photographic lighting language.
- Keep lighting consistent across a series of images or characters.
- Communicate more clearly with AI models, reducing random or inconsistent lighting.
From now on, try not to write prompts like “portrait of a woman” alone. Instead, say:
“Portrait of a woman, soft window light from the side, gentle shadows, natural falloff.”
Lighting is not an afterthought; it is one of your primary storytelling tools.
4. Differences between Lighting Setup and Color Grading
Beginners often confuse lighting with color grading because both affect the look and mood of an image.
Here is a simple way to separate them:
-
Lighting Setup
- Deals with where the light is, how strong it is, and how soft or hard it looks.
- Defines shadows, highlights, volume, and direction.
- Keywords: “soft key light”, “hard side light”, “backlight”, “three-point lighting”, “rim light”, “window light”.
- Question it answers: “How is the subject lit in 3D space?”
-
Color Grading / Color Style
- Deals with overall color mood of the image.
- Adjusts tint, contrast, saturation after the “lighting” is established.
- Keywords: “teal and orange color grade”, “muted pastel tones”, “high contrast film look”, “warm cinematic grading”.
- Question it answers: “How does the image feel in terms of color and tone?”
You can have:
-
Same lighting, different color grading
- Example: a portrait with soft side light, once graded warm golden, once graded cool blue.
-
Different lighting, similar color grading
- Example: two scenes with teal-and-orange grading, but one with soft front light and one with harsh top light.
In AI prompts, you will often combine both:
“Cinematic portrait with soft key light from the left and subtle rim light, teal and orange color grading, high contrast, filmic look.”
Here, lighting setup defines how the subject is lit, while color grading defines the final color mood.
5. Summary & Practice Exercises
Summary
- Lighting setup defines where light comes from, how strong it is, and how soft or hard it appears.
- Key, fill, and rim lights are the basic building blocks of professional portrait and product lighting.
- Soft, diffused light is flattering and gentle; hard light is dramatic and emphasizes texture.
- In AI prompts, using real lighting language (“soft window light”, “three-point studio lighting”, “cinematic side lighting”) drastically improves realism and mood.
- Lighting setup is different from color grading: lighting shapes 3D form and shadows, while grading shapes overall color and tone.
- Being intentional about lighting in your prompts turns generic AI outputs into images that look like deliberate photography or cinematography.
Practice Exercise: Basic Comparison
Use these exercises to build intuition for lighting setups in AI images.
-
Soft vs Hard Portrait Lighting
Generate two portraits:- “Portrait of a woman, soft diffused key light from the left, gentle shadows, flattering studio lighting.”
- “Portrait of a woman, hard top light, strong shadows under the eyes and nose, dramatic high-contrast lighting.”
Compare which one feels more flattering and which feels more intense.
-
Window Light vs Flat Indoor Light
Generate two lifestyle scenes:- “Man sitting by a window, soft natural window light from the side, background slightly darker, calm mood.”
- “Man sitting in a room, flat overhead ambient light, minimal shadow direction, neutral snapshot.”
Observe how much depth and mood the window-light version has.
-
Three-Point Product Lighting
Generate:- “Cosmetic bottle, studio three-point lighting, soft key light, subtle fill, rim light outlining the bottle, clean reflections, dark background.”
- Then remove the setup: “Cosmetic bottle on a table” with no lighting description.
Compare realism, clarity, and commercial feel.
-
Cinematic Character Lighting with Color Grading
Generate:- “Cinematic portrait, single side key light, deep shadows on one side of the face, subtle rim light from behind, neutral color grading.”
- “Cinematic portrait, same lighting setup, teal and orange color grading, high contrast film look.”
Notice how lighting defines volume, while color grading only changes mood and palette.
By repeatedly experimenting with lighting keywords, you will train your eye and your prompts to think like a photographer or cinematographer. Your AI images will gain depth, realism, and emotional impact simply because the light is finally under your control.