
AI-generated images often fail to look the way we expect.
Beginners commonly face issues such as:
- Characters that look “flat” with no sense of depth or space
- Action scenes that feel like simple screenshots instead of cinematic frames
- Faces that feel too confrontational or not powerful enough for the story
- Crowded scenes where perspective feels wrong or confusing
- Environments that do not feel immersive or three-dimensional
Most of these problems are caused not by the AI model itself, but by a missing understanding of a fundamental photography concept:
perspective & camera angle.
Understanding these principles allows you to create more dynamic, immersive, and story-driven prompts—regardless of the model you use.
1. Introduction to Perspective & Angle
In simple terms:
-
Perspective describes how objects appear in space relative to the camera. It controls:
- What looks close vs far
- How big or small objects appear
- How strong the sense of depth feels
-
Camera Angle describes where the camera is placed and how it is tilted relative to the subject:
- High angle, low angle, eye-level, top-down, over-the-shoulder, etc.
Think of it like this:
- Move the camera closer → subject looks bigger, background recedes.
- Move the camera farther away → subject shrinks, environment dominates.
- Place the camera low → subject feels large, powerful, heroic.
- Place the camera high → subject feels small, vulnerable, observed.
- Place the camera at eye level → neutral, natural, conversational feeling.
For AI image generation, you cannot physically move a camera, but the model understands phrases like:
- “low-angle shot”, “high-angle view”, “bird’s-eye view”, “top-down shot”
- “over-the-shoulder perspective”, “close-up”, “medium shot”, “wide shot”
- “dramatic perspective with strong depth”, “forced perspective”, “vanishing point in the distance”
By controlling perspective and angle in your prompts, you decide:
- How powerful or vulnerable characters appear
- How immersive environments feel
- How dynamic and cinematic the final frame looks
2. Applying Perspective & Angle in Prompt Writing
Let’s convert these ideas into practical prompt patterns.
2-1. When to Use It
You should intentionally describe perspective and angle when:
- You want a specific psychological effect (heroic, vulnerable, intimate, distant)
- You are creating cinematic scenes, storyboards, or key frames
- You want to clarify spatial relationships (who is in front, what is behind)
- You need varied shots in a sequence (wide, medium, close-up) for visual storytelling
Common angles and their uses:
-
Eye-Level Angle
- Camera is at the subject’s eye height
- Feels neutral, natural, conversational
- Good for portraits, interviews, everyday scenes
-
Low-Angle Shot
- Camera is below the subject, looking up
- Makes subject look powerful, imposing, heroic, or threatening
- Great for heroes, villains, monuments, tall buildings
-
High-Angle Shot
- Camera is above the subject, looking down
- Makes subject look smaller, vulnerable, observed
- Good for scenes about isolation, weakness, or overview
-
Bird’s-Eye / Top-Down View
- Camera is directly above, looking straight down
- Emphasizes patterns, layout, and geometry
- Useful for maps, battlefields, city blocks, tabletops
-
Over-the-Shoulder (OTS) Perspective
- Camera is behind one character, looking at another or at an object
- Creates a sense of being “in the scene”, narrative POV
- Great for dialogues, game-like perspectives, storytelling shots
-
Wide vs Close Perspective
- “Wide shot” shows full bodies and environment
- “Medium shot” shows waist-up or chest-up
- “Close-up” shows face or details for emotion and focus
Whenever a scene feels boring or flat, try changing perspective and angle instead of changing the subject.
2-2. Common Problems It Solves
Here is how perspective and angle directly address typical AI issues.
-
“The scene feels flat and not cinematic.”
- Cause: default eye-level, plain framing, no depth.
- Fix: introduce strong perspective and angle:
- “dramatic low-angle shot, strong sense of depth with converging lines”
- “wide shot with deep perspective down the street, vanishing point in the distance”
-
“My hero doesn’t feel powerful or iconic.”
- Cause: neutral angle and distance.
- Fix: use low angle and closer framing:
- “heroic low-angle shot, character towering against the sky, dynamic perspective”
-
“The character feels too distant from the viewer emotionally.”
- Cause: wide shot when you need a close-up.
- Fix: move in closer in language:
- “intimate close-up at eye level, focus on facial expression”
-
“My environment doesn’t feel immersive.”
- Cause: no emphasis on depth or viewpoint.
- Fix: ask for deep perspective and clear vantage point:
- “wide-angle view down a narrow alley, strong perspective lines, viewer standing at the entrance”
-
“Dialog scenes look like random screenshots.”
- Cause: generic eye-level, no POV or over-the-shoulder framing.
- Fix: use OTS and defined camera placement:
- “over-the-shoulder shot from behind character A, looking at character B across the table”
-
“The scale of things feels wrong (giant objects, tiny buildings, etc.).”
- Cause: no clear reference for scale, weak perspective.
- Fix: define vantage point and relative size:
- “view from street level, skyscrapers towering above, pedestrians visible for scale”
2-3. Prompt Examples
You can copy and adapt these prompts directly.
“Heroic fantasy warrior standing on a cliff, low-angle shot from below, character dominating the frame, sky and clouds behind, dramatic perspective, cinematic lighting.”
“Cyberpunk city alley, wide-angle perspective looking down the alley, strong vanishing point, viewer standing at the entrance, neon signs receding into the distance, deep depth.”
“Emotional close-up of a woman, eye-level angle, tight framing on her face, blurred background, focus on expression and eyes, cinematic portrait.”
“Top-down view of a working desk, bird’s-eye perspective, laptop, notebook, coffee cup arranged neatly, flat-lay style composition, clean modern aesthetic.”
“Over-the-shoulder shot of a character looking at a holographic interface, camera behind their shoulder, viewer seeing what they see, cinematic sci-fi UX scene.”
“High-angle shot of a child standing alone in a large empty plaza, camera looking down from above, child small within the frame, strong sense of isolation and scale.”
As you experiment, try changing only the angle words (low, high, eye-level, top-down, OTS) to see how the emotional impact shifts.
2-4. Detailed Use Cases
Concrete scenarios with suggested images and what the choice of perspective & angle does.
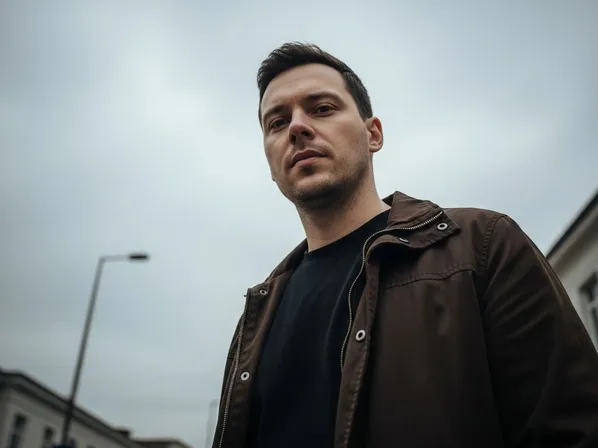
Use Case 1: Heroic vs Vulnerable Character
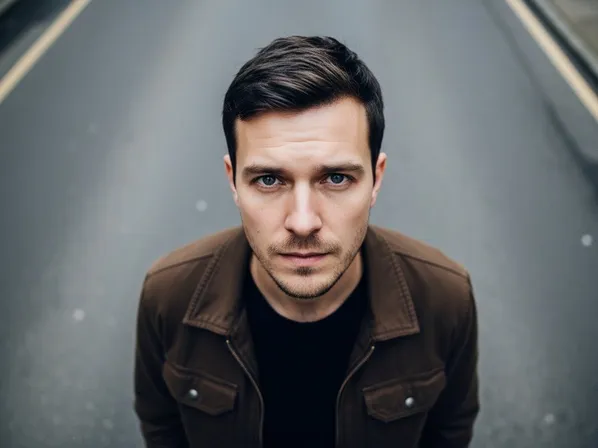
What changed and why:
The low-angle shot makes the character feel powerful, confident, or intimidating.
The high-angle shot makes them feel observed, smaller, or vulnerable.
In prompts, this is as simple as switching between:
- “dramatic low-angle shot of the hero”
- “high-angle shot looking down on the character”
Use Case 2: Wide Environmental View vs Intimate Close-Up
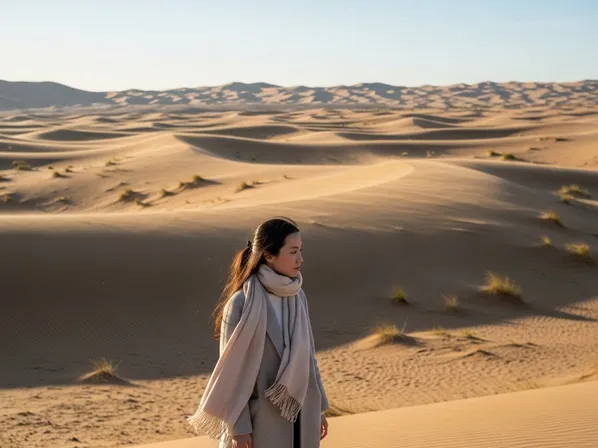
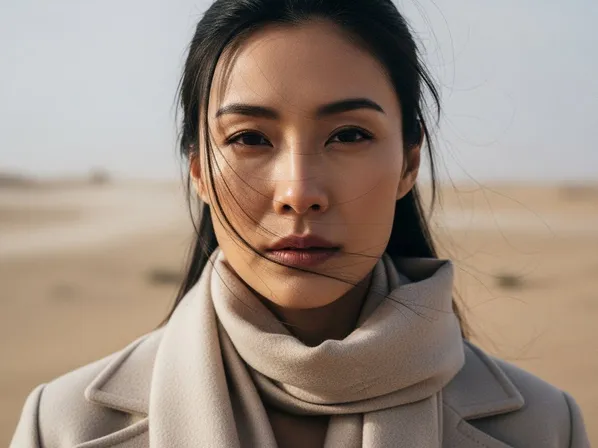
What changed and why:
The wide view tells a story about the world and scale.
The close-up tells a story about the character’s emotions.
In prompts:
- “wide establishing shot, character small in frame, vast landscape”
- “intimate close-up at eye level, focus on facial expression”
Use Case 3: Immersive Over-the-Shoulder Storytelling
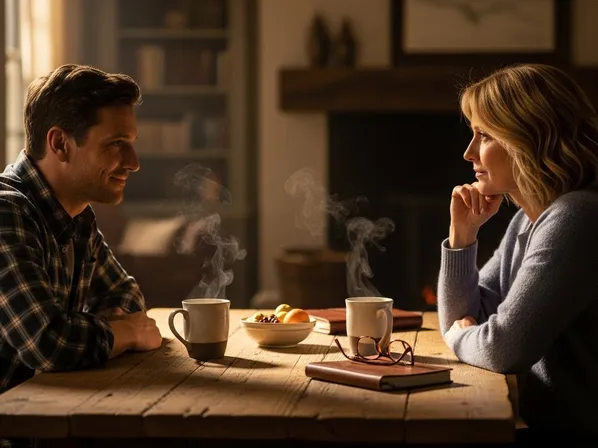
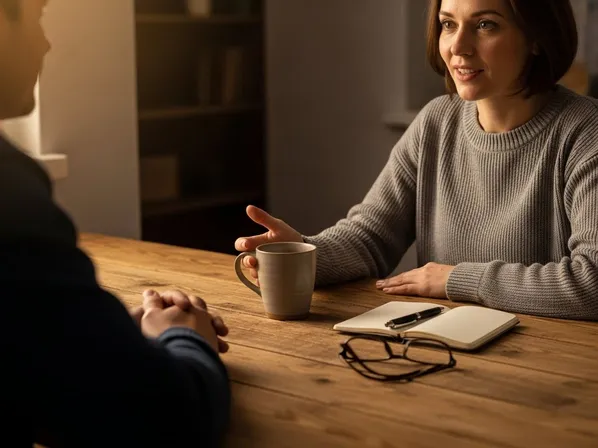
What changed and why:
The OTS shot puts the viewer inside the conversation, as if they are there.
Prompts like “over-the-shoulder shot, viewer standing behind character A” create instant narrative immersion.
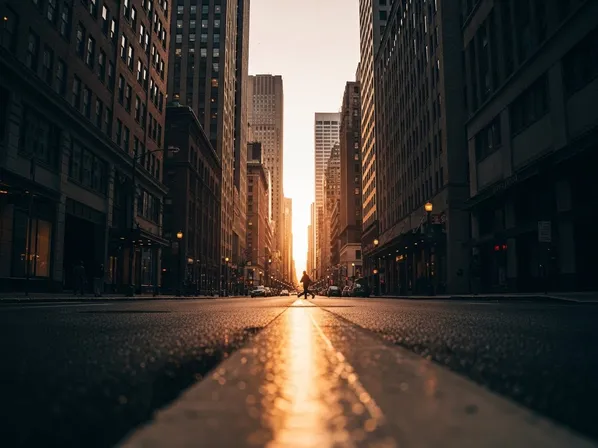
Use Case 4: Dramatic Street Perspective
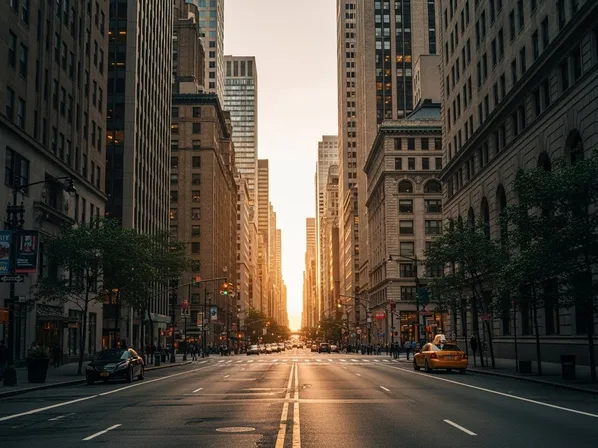
What changed and why:
The strong perspective version feels more cinematic, dynamic, and three-dimensional.
Use phrases like:
- “strong linear perspective, vanishing point in the distance”
- “low camera close to the ground, wide perspective down the street”
3. What You Can Do Now (Practical Benefits)
Once you start intentionally controlling perspective & angle, you can:
- Make characters feel more powerful, vulnerable, or relatable with one or two words.
- Turn generic scenes into cinematic frames with clear point of view.
- Clarify spatial relationships and scale in complex environments.
- Build shot sequences (wide → medium → close-up) for storyboards or comics directly from prompts.
- Reduce “flatness” and “random framing” by thinking like a director, not just a content describer.
From now on, do not only ask “what is in the scene?”—also ask:
“From where is the viewer seeing this?”
4. Differences between Perspective & Angle and Focal Length
Beginners often confuse perspective & camera angle with focal length, because all of them affect how the scene looks. But they do different jobs.
An easy way to separate them:
-
Perspective & Angle
- Defined by camera position and orientation.
- You change it by moving the camera up/down, closer/farther, or left/right, and by tilting it.
- Keywords: “low-angle shot”, “high-angle view”, “bird’s-eye view”, “over-the-shoulder”, “wide establishing shot”, “eye-level close-up”.
- Main questions:
- “From where are we looking?”
- “What emotional viewpoint does the viewer have?”
-
Focal Length
- Defined by the lens style (e.g., 24mm, 35mm, 50mm, 85mm).
- You change it by swapping lenses (in real life) or by describing lens type in prompts.
- Keywords: “24mm wide-angle”, “35mm street lens”, “50mm standard lens”, “85mm portrait lens”, “135mm telephoto”.
- Main questions:
- “How wide or zoomed-in is the view?”
- “How compressed or stretched is space?”
Important relationships:
-
You can have the same camera angle with different focal lengths:
- Example: low-angle shot with 24mm (dramatically stretched perspective) vs low-angle shot with 85mm (compressed, flatter background).
-
You can have the same focal length with different camera angles:
- Example: 35mm eye-level shot vs 35mm high-angle shot looking down.
In AI prompts, you can combine both for precise control:
“Low-angle shot of a hero, 35mm wide lens, strong perspective lines, city buildings towering above.”
Here:
- “low-angle shot” = camera angle (below, looking up)
- “35mm wide lens” = focal length (how wide the view feels)
- “strong perspective lines” = explicit emphasis on perspective
Think of it like this:
- Perspective & angle = where you put the camera.
- Focal length = what kind of lens you pretend is attached to that camera.
5. Summary & Practice Exercises
Summary
- Perspective defines how objects relate in 3D space relative to the camera (near/far, big/small, depth).
- Camera angle defines from where and how we look at the subject (low, high, eye-level, top-down, over-the-shoulder).
- Low-angle shots make subjects feel powerful; high-angle shots make them feel small or vulnerable; eye-level feels neutral and natural.
- Wide shots show environment and scale; close-ups prioritize emotion and detail.
- Perspective & angle are different from focal length: position/orientation vs lens style—but they work together to create cinematic images.
- Using explicit angle and perspective language in your prompts turns flat AI outputs into dynamic, story-rich frames.
Practice Exercise: Basic Comparison
Use these exercises to build intuition for perspective & angle in AI images.
-
Low vs High Angle Character
Generate two images:- “Fantasy knight in armor, low-angle shot from below, towering against the stormy sky, dramatic perspective.”
- “Fantasy knight in armor, high-angle shot from above, looking down at the knight standing in a ruined battlefield.”
Compare how the knight’s perceived power and mood change.
-
Wide vs Close Emotional Impact
Generate:- “Woman standing on a pier at sunset, wide shot, small figure in the distance, vast ocean and sky around her.”
- “Woman standing on a pier at sunset, eye-level close-up, focus on her face and emotion, background softly blurred.”
Notice which version tells a story about the world vs about the character.
-
Over-the-Shoulder vs Neutral View
Generate:- “Two people talking at a café table, eye-level shot from the side, both visible equally.”
- “Two people talking at a café table, over-the-shoulder shot from behind one person, viewer seeing the other person across the table.”
Decide which feels more immersive and narrative.
-
Perspective Depth in a Street Scene
Generate:- “City street during golden hour, neutral perspective, buildings on both sides, people walking.”
- “City street during golden hour, strong linear perspective with vanishing point in the distance, camera placed low near the road, wide-angle view down the street.”
Compare how much more dynamic and cinematic the second version appears.
By deliberately experimenting with perspective and angle keywords, you start thinking like a director or cinematographer. Your prompts stop being mere lists of objects and become instructions for where the viewer stands and how they experience the scene—which is exactly what makes AI images feel intentional and cinematic.